***Warning: Picture heavy post!***
Many of you wanted more info about the Magic Loop method for knitting socks, and Magic Loop two at a time. Before we tackle Magic Loop two at a time, let's make sure we are all familiar with magic loop. You experts out there feel free to chime in!
Magic Loop Tutorial (Part 1)
***I'm assuming you are somewhat familiar with how to knit socks. If you aren't and need more info let me know and I will be happy to direct you to some super websites for that info***
1. First off you need the right tools. For magic loop you need one long circular needle in the desired size.
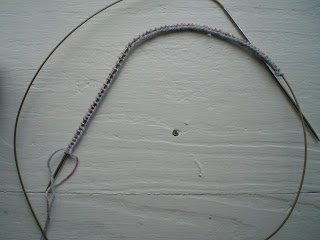
I'm not sure how long is ideal, mine here is 40 inches tip to tip. Some use shorter others longer. I find this size just right for me! My needles are Addi Turbos (only brand I've used for this method) Ideally you want needles that have a flexible cord because it will be bended and you want the joins (where the cord and needles meet) to be fairly smooth so your work won't snag.
2. Now we are ready to get started! Cast on your desired stitches onto the one needle.
3. Divide the stitches in two equal amounts. You are going to be pulling a loop of your cord out between the two halves. Here is that in pictures:
Stick needle between the two halves (note: cast on stitches should be on the cord, not needle part of your circular needles for this step)
Pull the cord through the stitches
Keep going until you have a nice size loop. As you can see my stitches get a little stretched in this process. No worries! When you start knitting make sure to give a little tug when you switch needles (just like with DPN to prevent ladders)
4. Now we are ready to join so we can knit in the round. Move your stitches to the needles part of your circular needle. You will want to keep the wrong sides of your sock (purls) facing each other on the inside at all times! Here my stitches are moved to the needles.
On the front needle are the stitches I want to knit next (the ones I first cast on) Pull the back needle out moving the back stitches onto the cord, leaving the stitches on the front needle alone.
Pick up the back needle and begin knitting! Knit all the front stitches in desired pattern.
5. Now that you have joined your stitches in the round, you are ready to go. After knitting the front stitches as shown
Turn your work making the back stitches the ones you just knit and the front stitches the ones you need to knit next. Remember the wrong sides should be facing each other on the inside.
Move the front stitches to the end of the needle (I think of this as home position!)
Now pull the back needle out moving the back stitches to the cord. You are ready to knit the front stitches!
Continue until you are ready to do your heel flap (that is part 2)
Summary: (after you have got started!)
1. Have your work in home position
2. Pull the back needle out
3. Knit the fronts
4. Turn work
5. Move the front stitches to the needle (now you should be in home position ready to repeat)
Now, what questions do you have? I'm sure others out there have them and are too shy to ask, so please don't hesitate!


