****Warning: Picture heavy post!****
I'm finally ready to finish the magic loop tutorial....the heel! In the next month or so I will post how to do magic loop two at a time.
1. Part 1 of the tutorial can be found
here! Also there have been some requests for a video (and blogger wouldn't let me email those commenters), so here are some video links for getting started!
(if you have others that you love, please leave a link in the comments!)
2. So you are ready to turn the heel on your sock.
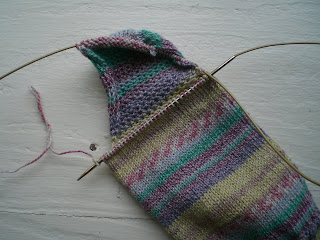
Knit the heel flap back and forth turning your work as needed, leaving half the stitch on the cord unworked.
Another view of heel flap.
3. Turn the heel, working short rows (any heel method would work and could be adapted, I'm just showing you my favorite)
4. Now you are ready to pick up the stitches along the heel flap. First move the heel stitches back on the cord, so you are able to use the needle comfortably.
Use the same needle (the one closest to the heel stitches) to pick up the heel stitches.
(In the end, we will have all the heel stitches on one needle and the top of the foot stitches on the other) Pull the needle so there is no "loop" between the picked up stitches and the bottom of the heel stitches.
5. Then work the stitches along the top of the foot. (you will need to turn your work to do this)
6. Now we need to pick up stitches on the other side of the heel flap. Move the top of the foot stitches down onto the cord so you can use the needle to pick up the stitches.
7. After picking up the desired stitches, keep knitting all the "heel" stitches. The "loops" should be positioned on either side of the top of the foot.
8. Work your gusset decreases as normal. I know right now there are a lot of stitches on one needle, but quickly they will decrease.
Now you should be good to finish your sock. Good Luck!! and as always ask me questions if something is unclear!


